You put a helmet together by attaching the suspension system to the shell. Then, you adjust the headband so it fits your head well. When you put it together the right way, you get the best protection at work or on a bike. Safety helmets use special materials and strong suspension to keep your head safe from every side. Many helmets have chin straps. These straps help keep the helmet in place if you move quickly. New helmets are made to be comfortable and safe. They help lower neck pain and keep you protected.
A helmet that fits right can really help keep you safe, whether you use it for building, working in a factory, or riding a bike.
Key Takeaways
Put together your hard hat by connecting the suspension system to the shell. This helps keep you safe when you wear it.
Change the headband so it fits your head well. If your helmet fits right, it will not move and will protect you better.
Look at your helmet for cracks or damage before you use it. Checking your helmet often helps keep you safe and makes sure it works.
Wash your helmet with gentle soap and water. Cleaning your helmet helps it last longer and makes it more comfortable.
Keep your helmet in a cool, dry spot away from sunlight. Storing your helmet the right way stops it from getting ruined and keeps it strong.
Parts and Tools
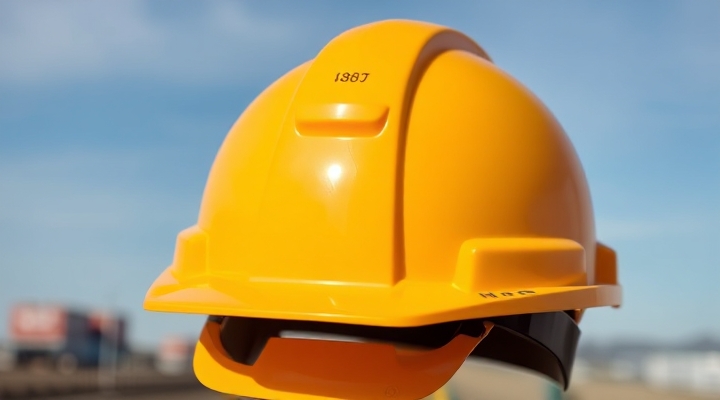
Hard Hat Components
When you assemble a hard hat, you need to know each part. Every piece has a special job. You can see the main components in the table below:
| Component | Purpose |
| Shell | Protects your head from impact and debris |
| Suspension System | Holds the shell above your head |
| Headband | Keeps the helmet snug and comfortable |
| Chin Strap | Secures the helmet during movement |
| Sweatband | Absorbs moisture for comfort |
| Accessories | Adds extra features like earmuffs or visors |
You find the shell as the hard outer layer. The suspension system sits inside the shell. The headband wraps around your head. Some hard hats have chin straps for extra security. Sweatbands help keep you dry. Accessories can make your helmet more useful.
Tip: Always check the instruction manual that comes with your hard hat. Each brand may have small differences in design.
Tools Checklist
You do not need many tools to assemble a hard hat. Most helmets use snap-in parts. You can put them together by hand. Here is a simple checklist:
Hard hat shell
Suspension system
Headband
Chin strap (if included)
Sweatband (optional)
Accessories (optional)
Instruction manual
You may want to use a small screwdriver if your helmet has screws for accessories. Most of the time, you can assemble everything without special tools.
️ Note: Lay out all the parts before you start. This helps you see what you have and makes assembly easier.
You now know the main parts and tools. You are ready to start assembling your hard hat.
Assembly Steps
Unpack and Identify
Start by opening the box or package that holds your new helmet. Lay out all the parts on a clean surface. You should see the shell, the suspension system, the headband, and any extra pieces like a chin strap or sweatband. Check the instruction manual to make sure you have every part you need. This step helps you avoid missing pieces before you begin.
Tip: Always match each part to the diagram in your manual. This makes the next steps easier and helps you build your helmet correctly.
Attach Suspension
Now, you will connect the suspension system to the inside of the helmet shell. Most helmets use a snap-in design, so you can press the suspension tabs into the slots inside the shell. Make sure each tab clicks into place. Some helmets may use a pin-lock or ratchet system. If your helmet has a chin strap, attach it to the shell at this stage.
Hold the helmet shell upside down.
Insert the suspension system so the headband faces the opening.
Line up the tabs or pins with the slots inside the shell.
Press each tab until you hear a click.
Tug gently on the suspension to check that it is secure.
If you skip this step or do it wrong, your helmet will not protect you as it should. Following the manufacturer’s instructions keeps the helmet strong and safe. An incorrectly assembled helmet can fail during a fall or impact, which can lead to serious injuries.
Adjust Headband
After you attach the suspension, you need to adjust the headband. This step makes sure your helmet fits your head. A good fit keeps the helmet from moving or falling off, even if you bend over or ride a bike.
Use the table below to see some features that help you get a comfortable and safe fit:
| Feature | Description |
| Adjustable Venting | Lets air flow through the helmet, keeping you cool. |
| Breathable Suspension | Shapes to your head for comfort. |
| Cushy Moisture-Wicking Padding | Keeps sweat away from your skin. |
| Self-Adjusting Front Paddles | Reduces pressure on your forehead. |
| 4-Point Ratchet Suspension | Lets you turn a knob for a custom fit. |
| 4-Point Pin-Lock Adjustment | Locks the headband in place for safety and comfort. |
Turn the ratchet knob or adjust the pin-lock until the helmet feels snug but not too tight. The helmet should sit level on your head, just above your eyebrows. If your helmet has a sweatband, attach it now for extra comfort.
Secure Fit
Put the helmet on your head. Shake your head gently from side to side and up and down. The helmet should stay in place and not slide around. If your helmet has a chin strap, fasten it under your chin and adjust it so it feels snug. A secure fit means the helmet will protect you if you fall or if something hits you.
Check that the helmet does not tilt forward or backward.
Make sure the headband does not pinch or cause pain.
Adjust the chin strap so you can fit one finger between the strap and your chin.
⚠️ Alert: Never wear a helmet that feels loose or wobbly. A poor fit can make the helmet useless in an accident.
Add Accessories
Some helmets let you add extra features like earmuffs, face shields, or visors. If you use your helmet for a bike ride, you might want a visor to block the sun. For work, you might need earmuffs for loud places. Follow the instructions for each accessory. Most snap or slide into place on the helmet shell.
Attach each accessory one at a time.
Make sure each piece locks or snaps in securely.
Test the helmet again to make sure nothing feels loose.
️ Note: Only use accessories made for your helmet model. Using the wrong parts can weaken the helmet and lower your safety.
By following these steps, you make sure your helmet gives you the best protection. Whether you use helmets for work or for riding a bike, always check your helmet before each use. A helmet that is not put together right cannot protect you. Take your time and follow every step for your safety.
Safety Helmet Fit
Proper Adjustment
You need to make sure your safety helmet fits you well before you use it. A good fit gives you the best protection at work or on a bike. If your helmet feels loose or too tight, it cannot keep you safe. Follow these steps to get the right fit:
Leave a small gap between the helmet shell and your head. The suspension system needs space to absorb impact.
Adjust the height of the helmet using the slots at the back of the suspension. This helps you find the most comfortable position.
Use the wheel ratchet or dial to tighten the helmet. It should feel snug but not hurt your head.
Always wear the helmet with the brim facing forward. Only turn it around if the helmet has a reverse donning symbol.
Check your skin for red marks or scrapes after wearing the helmet. If you see any, the helmet might be the wrong size.
Tip: Try on your helmet before you use it for work or a bike ride. Move your head up, down, and side to side. The helmet should stay in place.
Safety Check
You should check your safety helmet every time before you use it. Look for cracks or dents in the shell. Make sure the suspension system is not broken or twisted. Test the headband and chin strap to see if they hold the helmet steady. If you use your helmet for a bike ride, check that the helmet does not move when you ride over bumps.
Here is a table showing how users rate the comfort and fit of popular helmets:
| Hard Hat Model | Suspension Points | Weight (ounces) | Comfort Features |
| WaveCel T2+ Max | 4 | 17 | Dial fit system, soft foam padding, WaveCel technology for weight reduction and airflow. |
| Studson SHK-1 | 4 | 17.5 | Koroyd tubes for impact absorption, Brainshield helmet pad system for concussion risk reduction. |
| Milwaukee Type 2 Front Brim | 4 | 20 | 26 vents for airflow, antimicrobial liner, chin strap included. |
| MSA Super V Type 2 Fas-Trac III | 4 | 21 | Padded sweatband, easy dial fit system, V-Gard design for object deflection. |
| Milwaukee 6-Point Suspension Type 1 | 6 | 15 | Lightest model, larger ratcheting range for fit, padded sweatband. |
| Bullard Cen10 | N/A | 18 | Foam insert for weight distribution, comfort liner for cushioning. |
You can see that many helmets use soft padding, dial fit systems, and vents for airflow. These features help you stay comfortable during long hours at work or on a bike. Always pick a safety helmet that matches your needs and gives you the best protection.
Common Mistakes
Assembly Errors
You might think assembling helmets is easy, but small mistakes can lower your safety. Many people wear the helmet backwards. Unless your helmet has a reverse donning symbol, you should always wear it with the brim facing forward. Some users forget to adjust the suspension system. If you skip this step, your helmet will not protect you during a fall or impact. You may want to personalize your helmet by cutting holes or adding stickers. These changes can weaken the helmet and make it unsafe. Placing the helmet too high or too low on your head also affects how well it protects you. You should always check the fit before you use the helmet for work or a bike ride.
Here are some common assembly errors:
Wearing the helmet backwards without proper rating
Not adjusting the suspension system
Modifying the helmet with holes or stickers
Placing the helmet incorrectly on your head
Ignoring signs of wear from sun or chemicals
⚠️ Alert: Never change the shape of your helmet. You risk losing protection if you do.
Troubleshooting
If your helmet feels uncomfortable or loose, you need to fix it before you use it. Start by checking the suspension system. Make sure all tabs click into place. If the helmet moves when you shake your head, tighten the headband or chin strap. Sometimes, helmets feel heavy or cause neck pain. You can try a lighter helmet or adjust the padding. If you use your helmet for a bike ride, test it on short trips first. If you see cracks or faded colors, replace the helmet right away. Helmets lose strength over time, especially if you leave them in the sun or expose them to chemicals.
Use this table to help solve common problems:
| Problem | Solution |
| Helmet feels loose | Tighten headband and chin strap |
| Helmet causes pain | Adjust padding or try a different size |
| Helmet moves on bike | Check fit and suspension system |
| Helmet looks damaged | Replace helmet immediately |
| Helmet feels heavy | Choose a lighter model |
Tip: Always inspect your helmets before each use. A quick check can save you from injury at work or on a bike.
Maintenance Tips
Cleaning
You keep your helmet safe and comfortable by cleaning it often. Dirt and chemicals can build up on the shell, especially if you use helmets for work or bike rides. You should wash your helmet with warm water and mild soap. Use a soft washcloth to wipe down the shell until it looks clean. Let the helmet air dry before you use it again.
Never use strong cleaners or paint on your helmet. These can weaken the shell and lower your protection.
Check your helmet every day for cracks, tears, or worn-out parts. Make sure the headband still fits well. If you see any damage, replace the helmet right away. Many brands recommend cleaning your helmet at least once a month. This habit helps your helmet last longer and keeps you safe whether you use it for work or as a bike helmet.
Storage
You protect your helmet by storing it the right way. Always keep helmets in a cool, dry place. Direct sunlight can damage the shell and make it weak. Many brands suggest storing your helmet away from windows or hot areas.
Follow the instructions from your helmet’s manufacturer for the best results.
Do not leave your helmet in your car or outside. Heat and sunlight can shorten its life. If you use helmets for bike rides, bring them inside after each trip. Proper storage helps all brands of helmets stay strong and ready for use.
Store in a cool, dry area
Keep away from sunlight
Follow brand instructions
Avoid leaving helmets in hot places
Replacement
You need to know when to replace your helmet. Most brands give clear rules for helmet replacement. If your helmet takes a hit or shows damage, replace it right away. Even if your helmet looks fine, it has a limited lifespan. Many brands suggest replacing the shell every five years and the suspension every year. Some brands, like JSP and 3M, recommend a three- to five-year lifespan for helmets used on the job or for bike rides.
Here is a table showing when to replace helmet parts:
| Replacement Component | Recommended Interval |
| Suspension | Every year |
| Shell | Every 5 years |
| After impact/damage | Immediately |
You should check the date of manufacture on your helmet. Replace the shell after five years or sooner if you use it often. Helmets lose strength over time, even if you use top brands. Always choose a new helmet if you see cracks, faded colors, or worn straps. This rule applies to all helmets, including bike helmets.
Helmet Comparison
Best Bike Helmets
You want a bike helmet that keeps you safe and comfy. Many brands make helmets with high safety ratings. WaveCel uses special technology to protect your head better. This helmet can absorb more twisting force than regular helmets. That means it works well and keeps you safer. When you read reviews, look for easy-to-adjust straps, good airflow, and light shells. The best adult bike helmets have dial fit systems and soft padding. Always check for certified labels before you buy. Kids’ bike helmets also need to be certified for safety. Use a buying guide to compare brands and ratings. If you are not sure how to pick a helmet, start by reading reviews and ratings. Always choose certified helmets from brands you trust.
Tip: Certified helmets keep you safer. Always read reviews and ratings before you buy.
Motorcycle Crash Helmet
Motorcycle crash helmet safety depends on strong brands and tough materials. Look for snell certified helmets and check sharp helmet test results. The safest brands use advanced liners and shells. Read reviews to compare ratings and how well helmets work. Motorcycle helmets must pass strict safety tests. Many brands add features like anti-fog visors and foam that absorbs impact. Always pick a certified motorcycle helmet for the best safety. Ratings help you find the safest brands. Reviews show which helmets have the highest scores.
| Type/Standard | Description |
| OSHA Standard 29 CFR 1926.100 | You must wear protective helmets where there is a risk of head injury from falling objects or electricity. |
| ANSI Z89.1 | This standard explains hard hat rules like fire safety, force protection, sharp object safety, and electrical safety. |
Note: Certified helmets from top brands protect you better. Always read reviews and ratings before you ride your motorcycle.
Best Bike Helmets for Adults
You need a good bike helmet for adults to stay safe and get the best performance. Certified helmets from trusted brands have better ratings and feel more comfortable. Reviews help you compare things like airflow, fit, and weight. Many brands make adult helmets with adjustable systems and extra padding. Always check ratings and reviews before you buy. The best adult bike helmets come from brands like WaveCel, Bell, and Giro. Pick certified helmets for the best protection. Ratings and reviews show which brands work best.
Features to look for:
Certified labels
High ratings
Comfortable fit
Lightweight design
Trusted brands
Tip: Use reviews and ratings to find the best adult bike helmets. Certified helmets from top brands keep you safe.
You put your helmet together by adding the suspension unit. Make sure it faces the right way. Adjust the straps so the helmet fits tightly. Always look for cracks or worn parts before you use it. Clean your helmet with gentle soap. Keep it away from sunlight when you store it. Top brands make helmets with anti-concussion features and side protection. They also offer custom fit for safety at work or on a bike. Picking trusted brands gives you better safety and saves money over time.
| Feature | Benefit |
| Custom fit | Comfort for long wear |
| Side protection | Reduces risk from side impacts |
| Trusted brands | Reliable safety and durability |
FAQ
How do you know if your hard hat fits correctly?
You should feel the helmet sit snug on your head. The shell should not move when you shake your head. The brim should rest just above your eyebrows. Adjust the headband and chin strap for a secure fit.
Can you wear a hard hat backwards?
You should only wear a hard hat backwards if it has a reverse donning symbol. Most helmets protect best when you wear them forward. Always check the manufacturer’s instructions before turning your helmet around.
How often should you replace your hard hat?
You should replace the shell every five years and the suspension every year. Replace your helmet right away if you see cracks, dents, or after any impact. Always check the date of manufacture inside your helmet.
What should you do if your hard hat feels uncomfortable?
Try adjusting the headband or chin strap. Add or move padding if possible. If the helmet still feels uncomfortable, you may need a different size or model. Comfort helps you wear your helmet longer and stay safe.


